I took a break from robotics after a machine learning project on semantic navigation.
I was at a Christmas party and heard about an open-source initiative for 6 DoF robotic arms called LeRobot. There were even pre-arranged Bambu 3D printing files available, so I printed the SO-100 and got to assembling it as soon as my motors arrived.
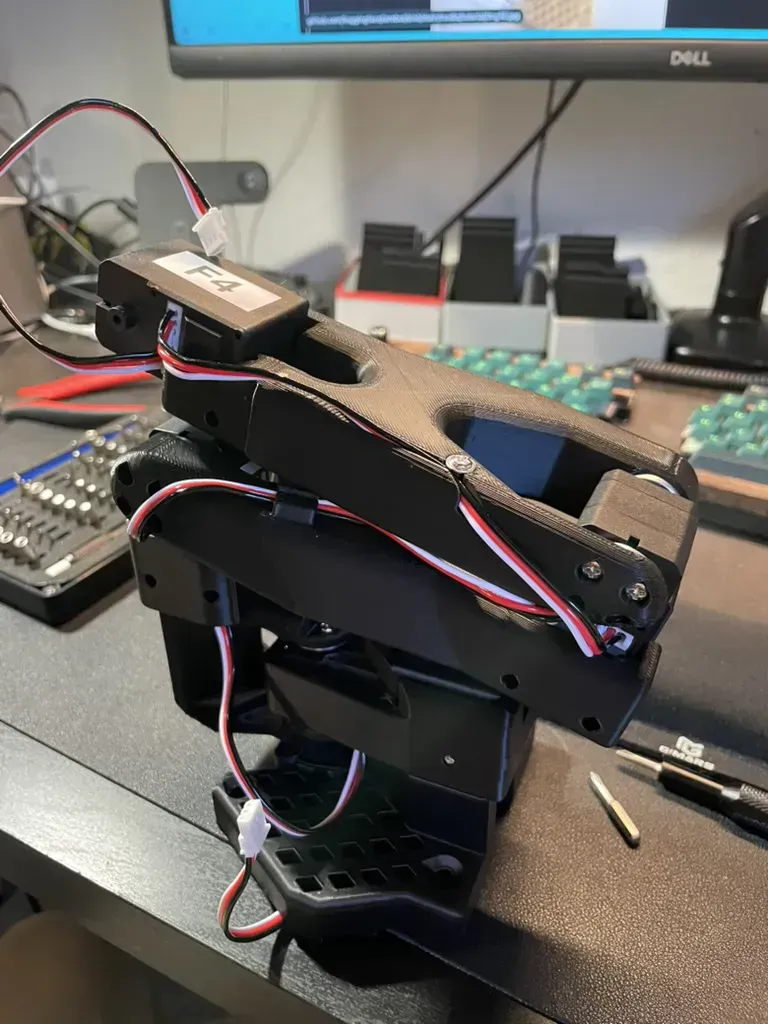
There was an issue where one motor (specifically the 3rd joint from the bottom) would just blink and not work at all. I tried getting help, but eventually gave up and packed it away for a bit.
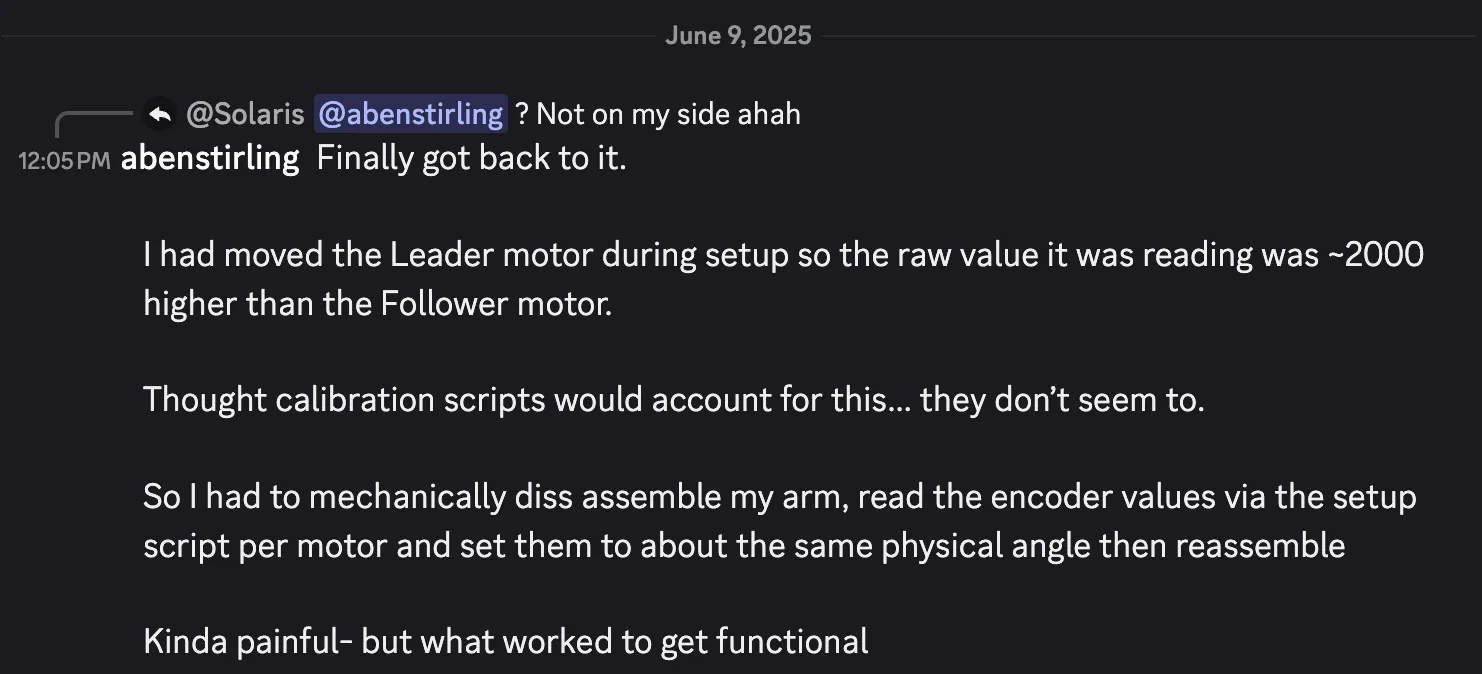
After a 3-month break and moving to a different apartment, I pulled it out, debugged the motor, and finally got it working.
The above ran with the following command:
python lerobot/scripts/control_robot.py \
  --robot.type=so100 \
  --control.type=teleoperate
This is teleoperation ("teleop") where I control a leader arm that the follower arm mimics.
Goals
Let me define goals for this project:
- Train the robot to do a custom task
- Have it perform autonomously with an 80%+ success rate
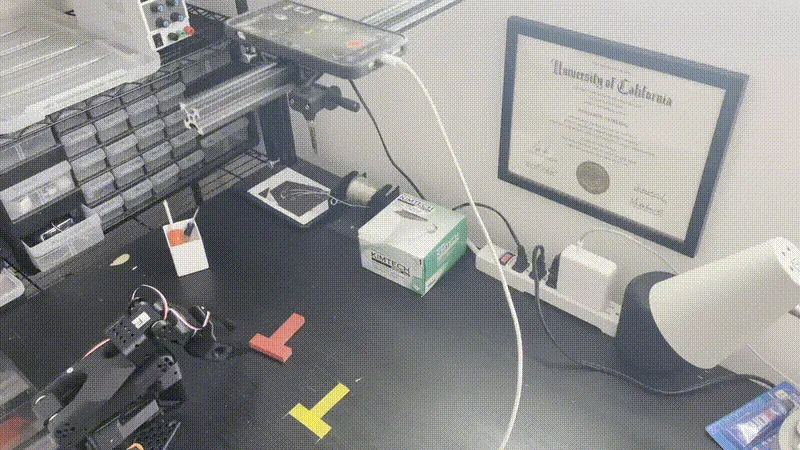
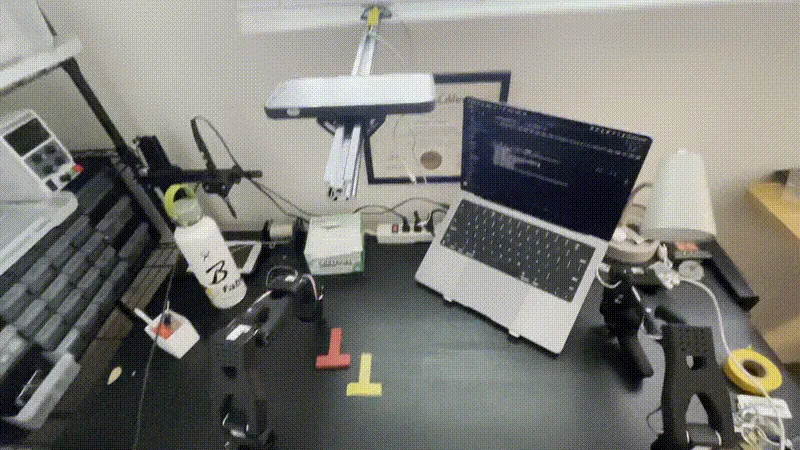
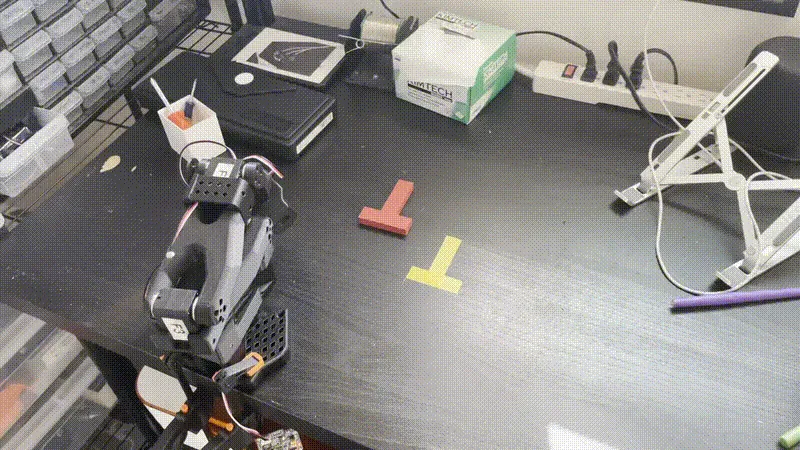
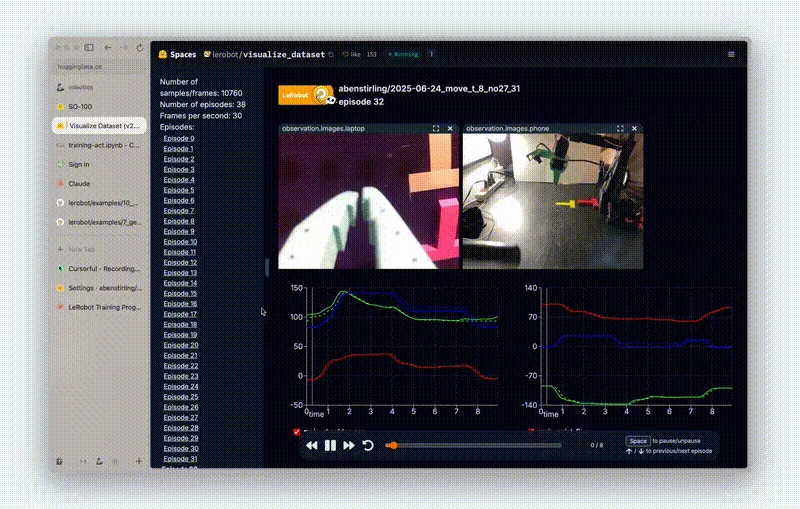
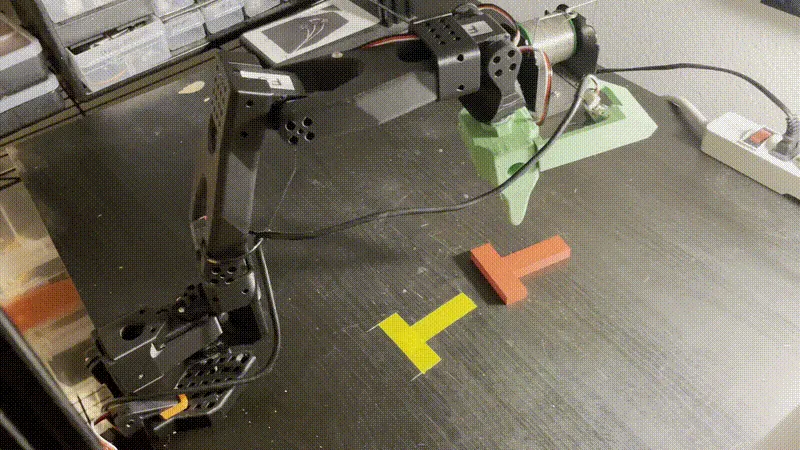
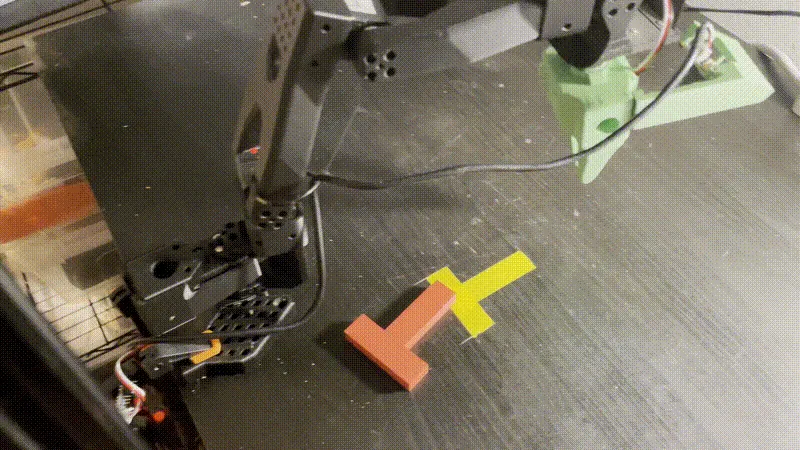
Move-T is my challenge. The goal is to place the red T on the yellow outline.
How is something like this possible to do? How
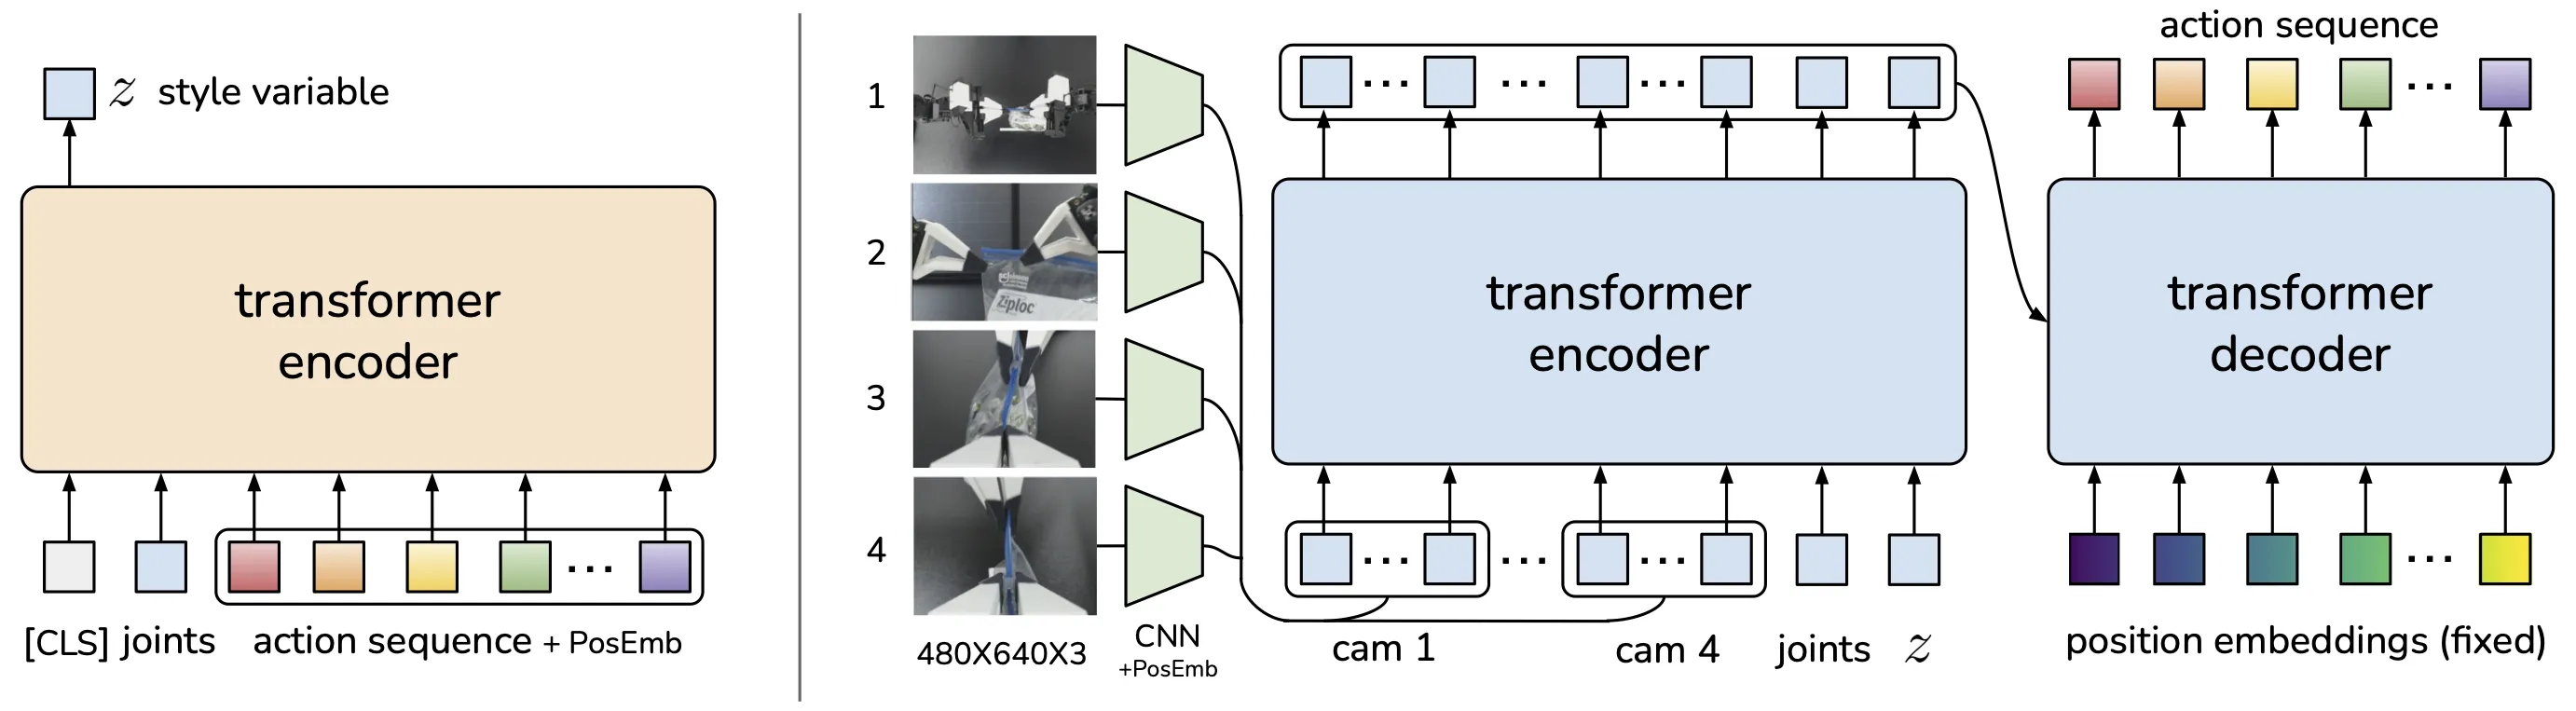
The magic is in the ACT (Action Chunking Transformer) model that we are training. It takes human demonstration data from teleoperated robots and trains a transformer model to predict sequences of future actions (called 'action chunks') rather than single actions, which reduces error accumulation and enables precise manipulation tasks with minimal training data. I have a picture below that somewhat explains it, but to learn more you can read about the ALOHA setup.
1st Attempt
Setup:
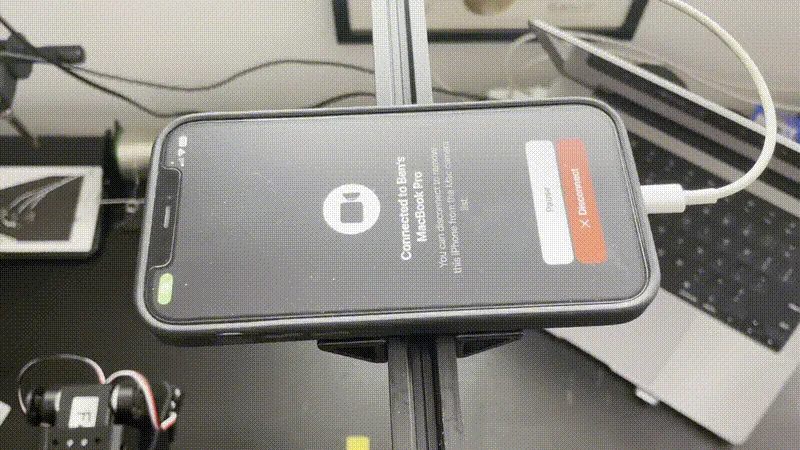
- MacBook camera (front scene view)
- iPhone continuity camera (overhead view)
- 40 episodes total (10 repeats per initial T position)
I ran the following command to get data:
python lerobot/scripts/control_robot.py \
  --robot.type=so100 \
  --control.type=record \
  --control.fps=30 \
  --control.single_task="Move T to where it belongs." \
  --control.repo_id=${HF_USER}/so100_move_t2 \
  --control.tags='["so100","tutorial"]' \
  --control.warmup_time_s=10 \
  --control.episode_time_s=15 \
  --control.reset_time_s=15 \
  --control.num_episodes=40 \
  --control.push_to_hub=true
Note: I pushed to Hugging Face in case my MacBook dies during training.
Results:
 This took 26 HOURS to train. The results were terrible - the robot couldn't complete the task reliably. It just kept slamming itself into the table.
Key learnings:
- Need to find a way to train faster to shorten the feedback loop
- Need to debug data with wandb (Weights and Biases)
- Review the data quality (comb through it to ensure cameras are properly positioned)
2nd Attempt
Problem Analysis: I began to think about the problem from first principles. The laptop camera was giving a poor perspective of the task, and I realized the camera angle was likely confusing the model.
Setup Changes:
- Removed laptop camera footage (deleted from Hugging Face)
- Switched to cloud training using A100 rental via Colab
- Same iPhone overhead camera setup

Training Workflow:
Colab → Setup LeRobot → Download training data (HF) → Train → Upload model (HF)
Results:
- Training time: 2h 14m 52s
- Cost: $2.33
- Performance: Still unsuccessful at completing the Move-T task
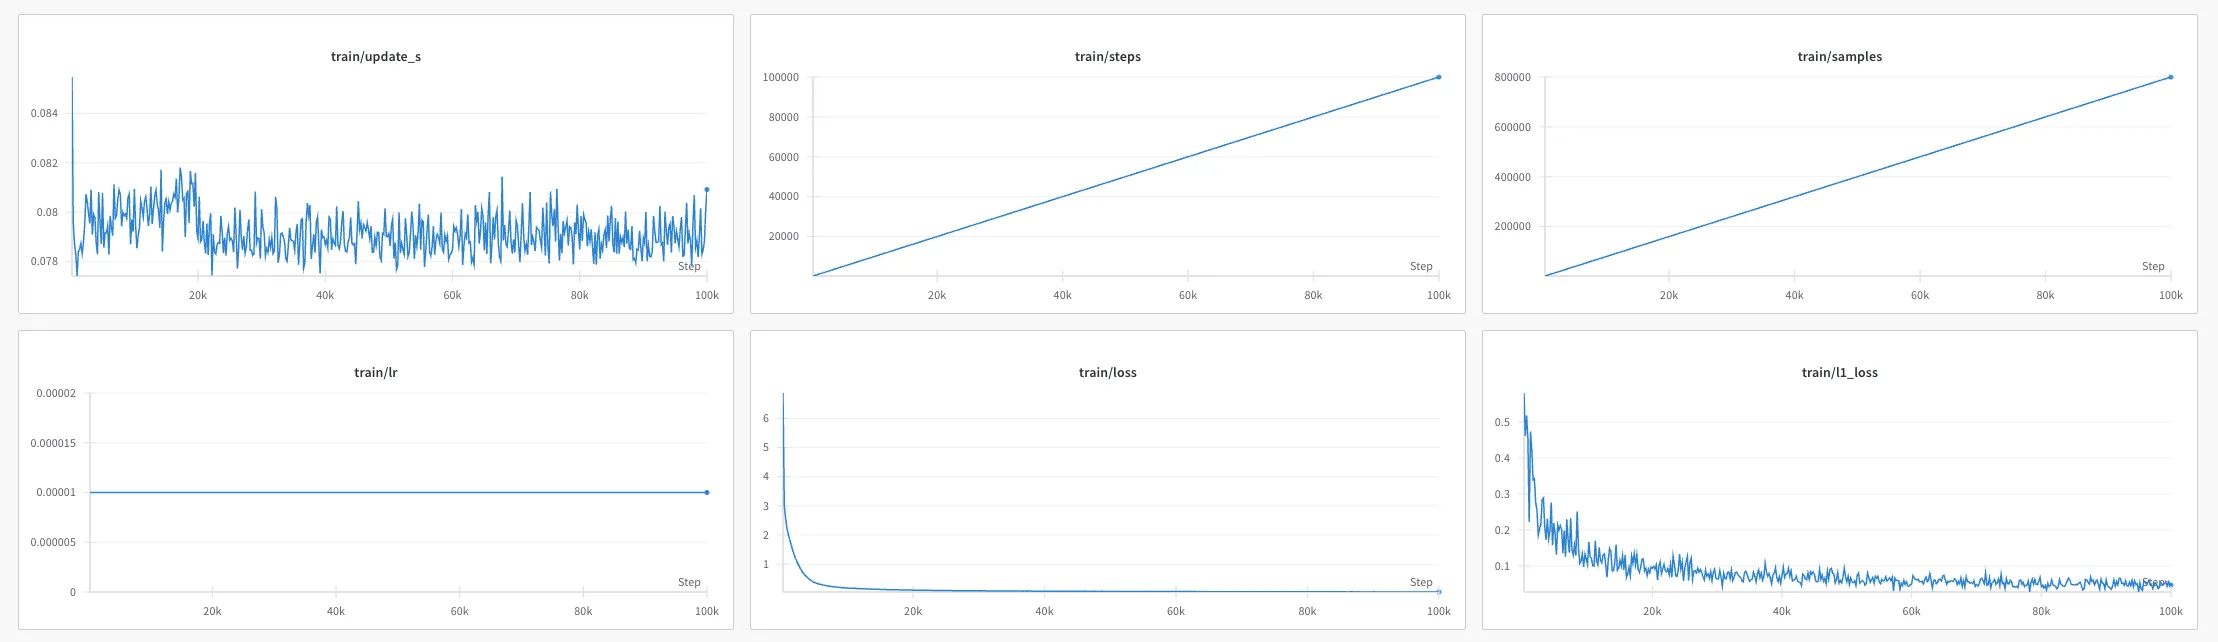
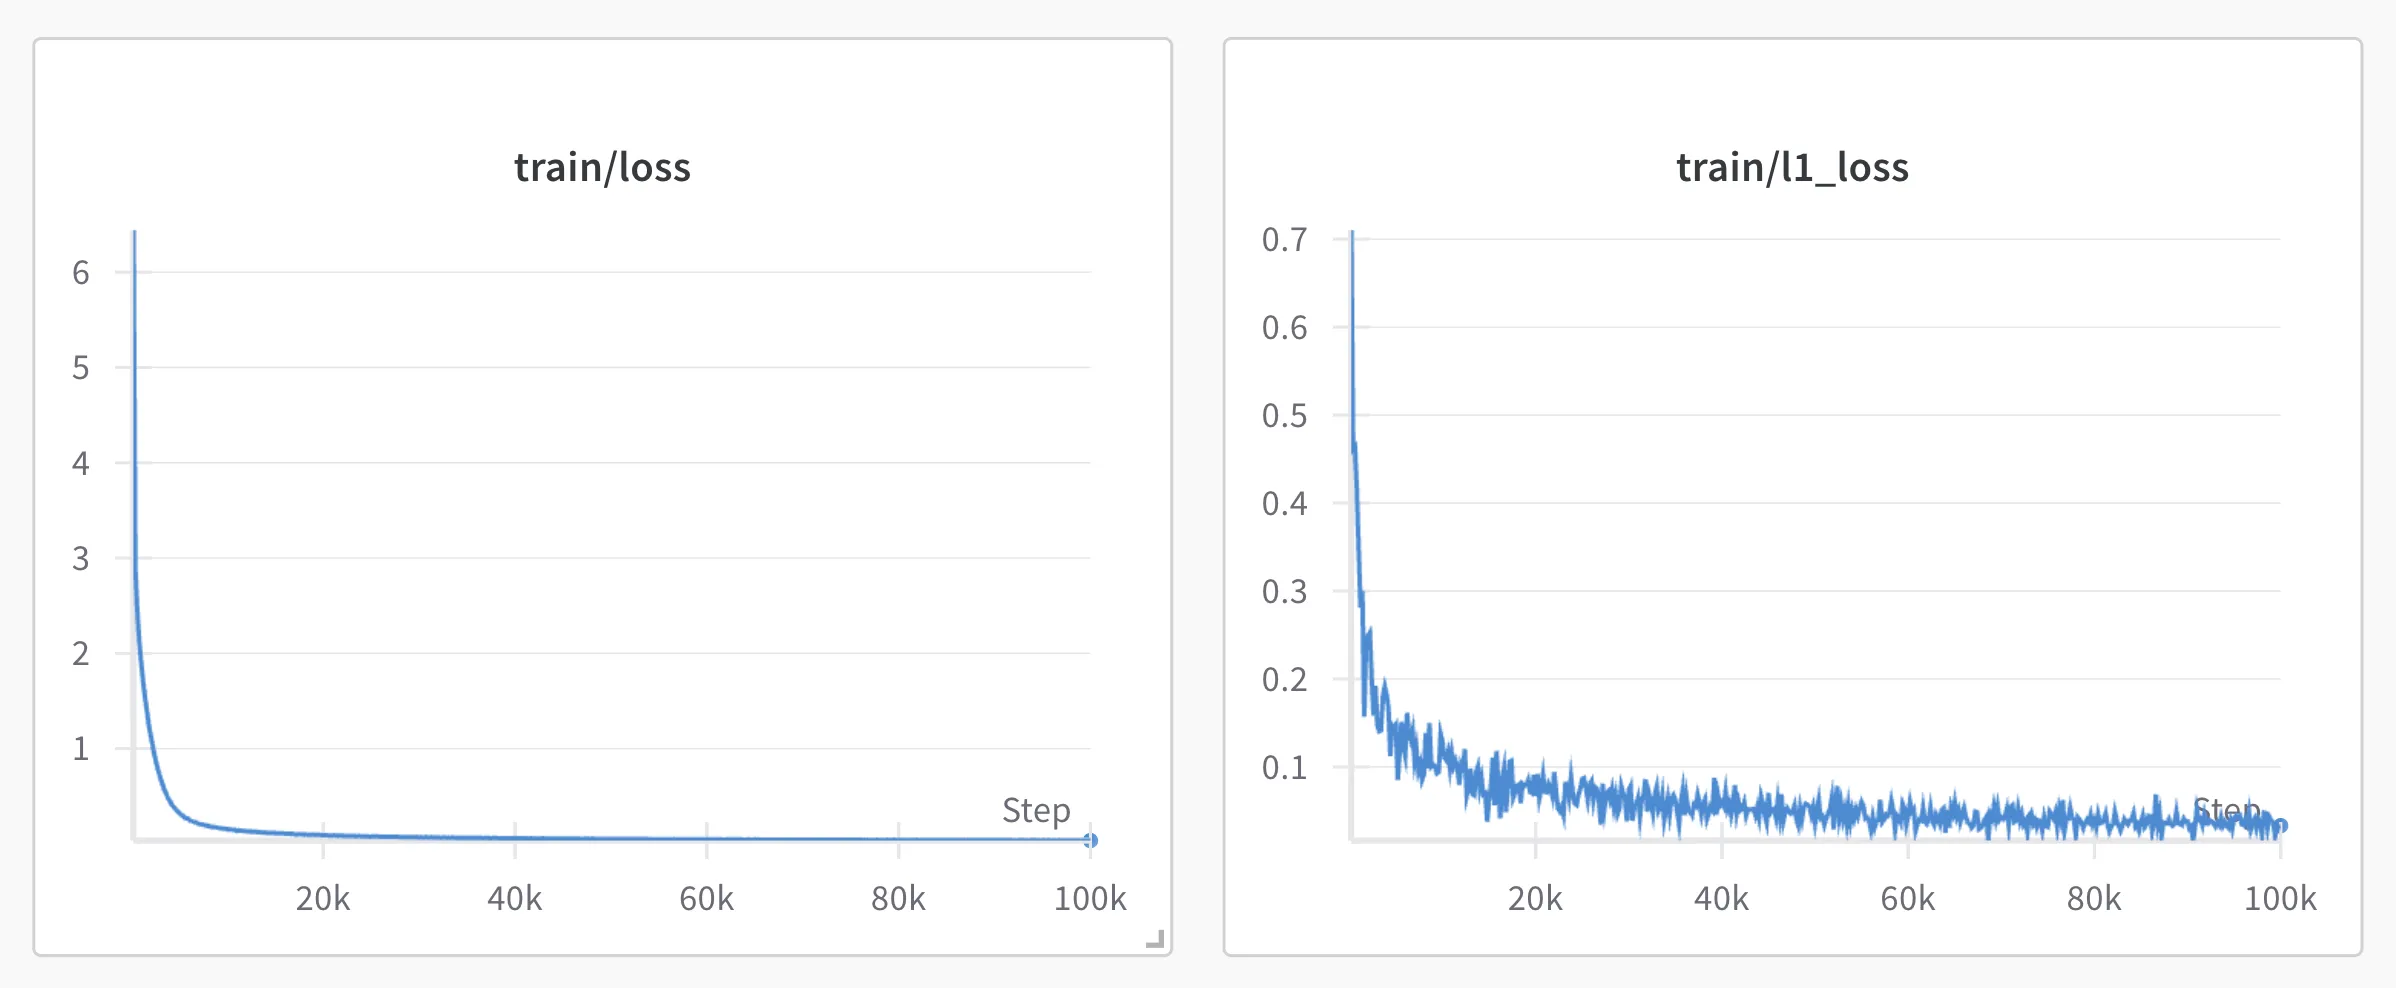
Wandb metrics:
Key learnings:
- Data quality is the primary driver of robot performance
- Cloud training is essential for reasonable iteration speeds (13x faster than local)
3rd Attempt
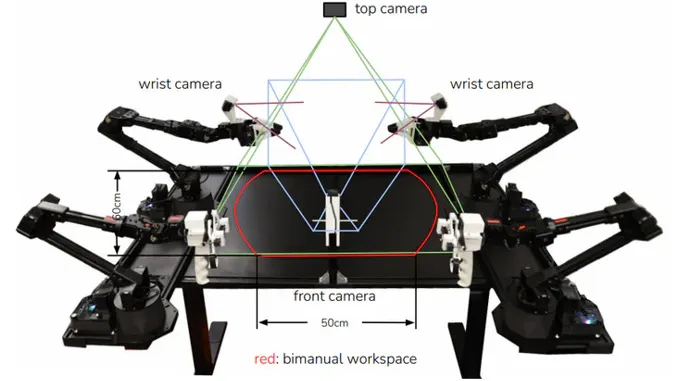
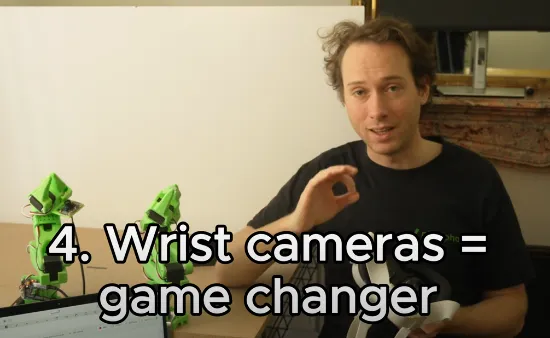
Research Phase: I began researching what other successful robotic systems did for camera positioning. Looking at systems like ALOHA, I noticed they used multiple camera angles including wrist-mounted cameras.
Key Insight: Based on this insight from the research:
Setup Changes:
- Added wrist camera: Provides detailed view of end-effector and object interactions
- Repositioned overhead camera: Moved to side angle for better spatial relationship understanding
- Multi-view approach: Combining close-up manipulation details with broader scene context
Training Workflow: This didn't train, but I had to run it twice because I didn't upload it to hf the first time, and the Colab kernel closed.
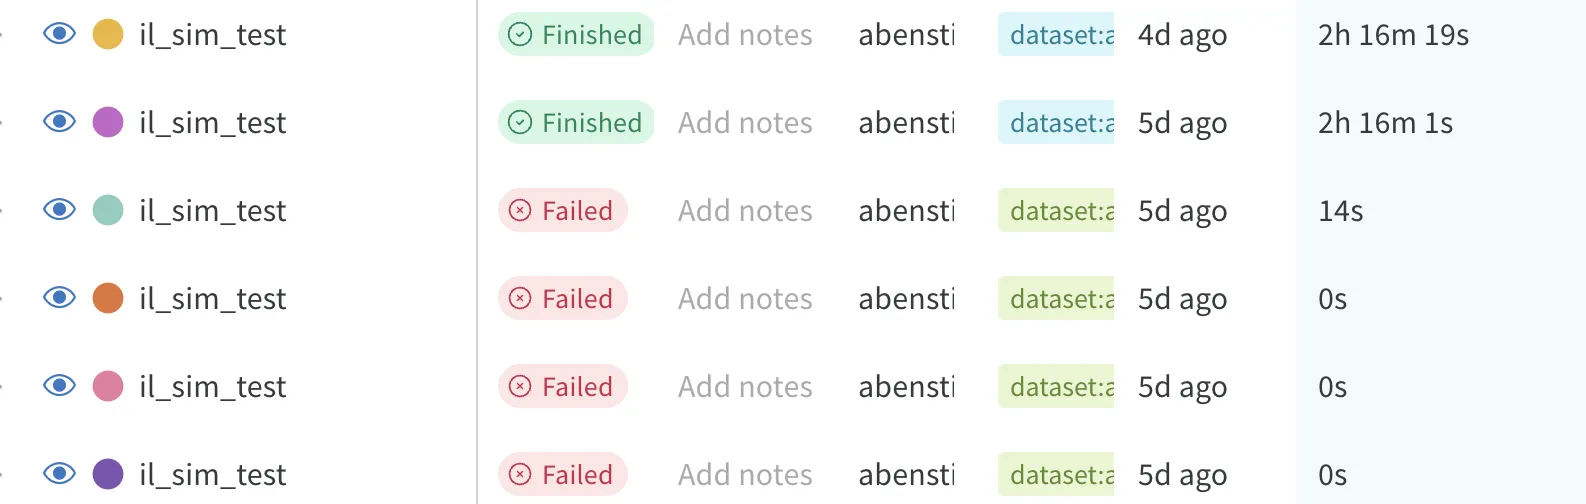
Results:
- Training time: 2h 16m 19s (successful training)
- Cost: $4.66 (inclusive of training I lost)
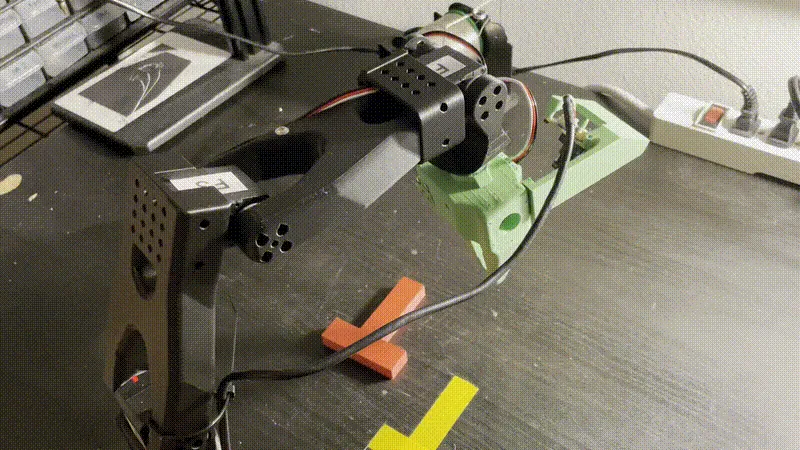
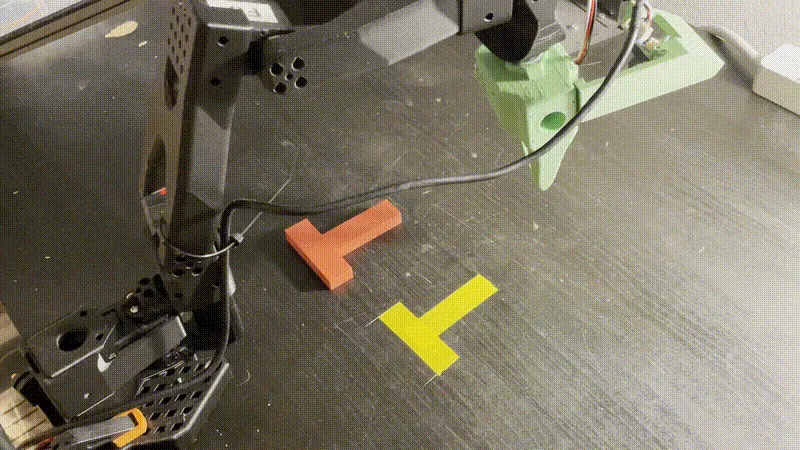
- Performance: IT MOVED T! It had around a ~75% success rate.
Warning: the following is completely autonomous
Recap
Wow. This was such an amazing feeling to see that arm work and truly opens my eyes for the breakthroughs that are coming to civilization.
Obviously, my arm isn't perfect. But the trajectory is heading towards a world where you verbally tell your robot to do anything and it can do it for you.
- "do my laundry"
- "organize my room"
- "clean the bathroom"
- "inventory the fridge"
- "make me a healthy pb banana smoothie"
are just a few supremely useful examples that if they were removed would make living just more enjoyable.
I discussed with my friend what an initial requirement would be a consumer robot and we came up with the following:
- puts dishes in dishwasher
- folds laundry
- gets you a beer (or kombucha for my fellow dd's)
- < $1000
Q&A
Q: My brother asked a good question - why do we need both a leader and follower arm? Why can't you just guide a single arm directly?
A: We're using a Vision-Language-Action (VLA) model that learns from visual demonstrations. Having a human hand directly in the scene would interfere with the visual encoding, as the model would learn to expect human hands during execution. The leader-follower setup keeps the demonstration space clean while still capturing natural human movements.
Next Steps
- Explore more complex manipulation tasks
- Explore ugraded arm (bent sheet metal)
- Explore custom camera setup (small claw-mounted)
- Explore better motors
- Ones that are stronger, faster, lighter